Feeds:
Posts
Comments

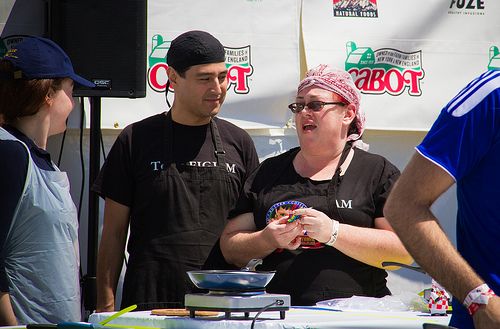
When I heard that this year’s Grilled Cheese Invitational was going to be held at the Rose Bowl, I kind of freaked out.  I mean, being a lifetime resident of Los Angeles, the Rose Bowl holds a certain aura:  it’s the arena where legends have been made, where epic concerts have been held.  Sure, the event was being held in the parking lot, but… it was still the frickin’ Rose Bowl!

Now, if you’ve been around me long enough, you know one of the things I live for is this competition.  My first one was four years ago, and I was hooked.  Sometime around January, my idle thoughts will turn to grilled cheese, long before they set the date for the event.  My friends are tortured by my constant ideas about what I could stick between two pieces of bread that would make a winning sandwich; I subject them to rounds of tastings, trying to pull out opinions of how to make my ideas better.  One of my best friends, Moris, supplies me with all manner of cheesy puns to use for naming my creations.

This year was going to be different.  The past three years of walking away empty-handed gave me the experience of how to make good use of my time during the competition.  I knew to print labels for my sample plates (no more “what’s in this?”) and I knew how to prep in such a way that my samples came out fast and hot.  I was ready for victory. 

We arrived bright and early, ready to do battle in the first two heats.  And when I say heats, I’m not joking.  It was hot you guys.

Talking to our neighbor for the first two heats, and we’ve got our game faces ON.

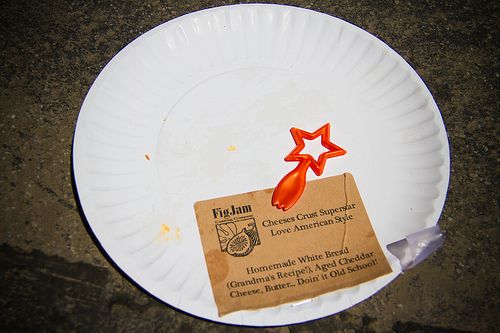
When the spatulas dropped, we got to work.  First up, we had our Love, American Style sandwich, Cheeses Crust, Superstar.  It’s your classic grilled cheese:  white bread, American or Cheddar cheese, and butter.  I made my own bread, of course, with the recipe taken from my grandmother’s old Better Homes & Gardens 1960’s red-checkered cookbook.

I’ll forgive my official photographer for not getting a picture–it was a good sandwich.

We never got a picture of our Honey Pot entry, Lady Lemon Licker.  And, if any of you fine folks out there who attended, if you got a picture, can you help a girl out?  I was so focused on getting out my samples I forgot to get Choo to take a picture!

So, after getting our sandwiches out, we had several hours to burn and several friends who traveled from all over the country to come see me compete.  And, not only that, these wonderful people made sure I was never without beer the rest of the afternoon.  The time came to hear the winners.  I waited near the stage; it was nothing new, we had done this before.

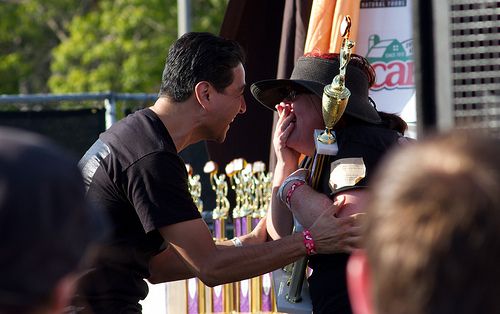
And then this happened:

Trophy Number One  (Sorry you guys, you’ll have to click the link for the video, THANKS, WordPress!)

I think this picture really captures it for us.  And I’d say it was the beer, but I was NOT letting go of that trophy!

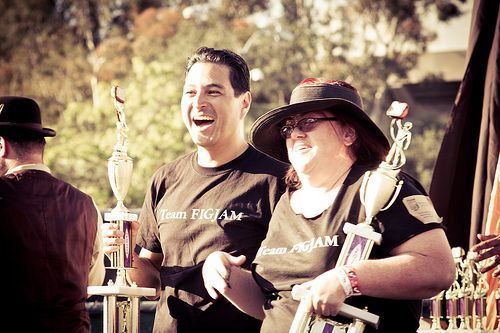
But… we weren’t done yet:  Trophy Number Two

Look it that!  Trophies won!  At the frickin’ Rose Bowl!

And there we are with our friends, Jodi & Sparky, who also won (2nd place Honey Pot, Spaz, and Frontiers in Fromage), and, YES, I’m on the phone with my mom!  Who do you call when you win something like that?  Mom, of course!  I don’t think I made much sense, but she was happy for me.

After all the cheese and all the beer and all the trophies, it was time to celebrate.  We headed to 1886 in Pasadena, which has a gorgeous patio that was just the right size for our little party, and I took some time to bask in the glow of being a winner:

You know I’m coming back next year; I have more categories to win.  Team FigJam:  in it to win it for 2013!

And, since I don’t want to be rude, I’d like to thank my friends:

  • David Schneider, my official photographer.  You can see the rest of his pictures from this event here.
  • Chris, who took the video of my wins, and his sister, Katie, who came all the way out from Atlanta!
  • Margaret, my favorite co-worker, who showed up and screamed and cheered us on the entire way.
  • Moris, Cristhian, Jodi, Sparky, Mike, and especially Jason, who even after I set his oven afire earlier this year, still let me do a test run in his kitchen without batting an eye;  I’ve tortured you with enough grilled cheese to last you the rest of 2012.
  • Jeff and Ange and their friends, who all were down from San Francisco and cheered me on, too.

I have awesome friends.  I attribute my win to you guys; you helped make it happen.
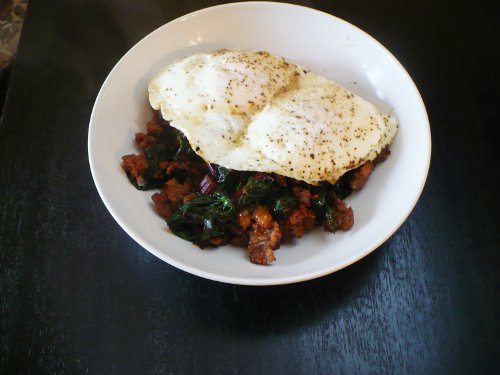
Up at the crack of dawn, I spent this Sunday morning firing up the smoker for Turkey #1 (see last year’s smoked turkey).  After all that, I wasn’t just hungry, but Tony Robbins Hungry.  I needed a solid and hearty breakfast and I had a bunch of chard that needed to get used up today; this created a dish borne from necessity, and yet, it was everything I could have asked for in a Sunday breakfast.

Sausage & Chard Sauté with Eggs

Serves 4

  • 1 pound pork or turkey breakfast sausage (we used pork, of course)
  • 1/4 cup onion, diced small
  • 1/2 bell pepper, diced small
  • 1 bunch chard, stems removed and chopped separately, leaves cut into 1″ ribbons
  • 1/4 cup chicken or beef stock
  • Salt & pepper to taste
  • Eggs (we served 2 per person, but the amount will depend on your own appetite)
  1. In a large skillet on medium heat, start to brown and crumble sausage.
  2. When sausage starts to brown and give off fat, add onions and bell pepper, cook until onions translucent, about 5 minutes.
  3. Add chard stems and saute for another 2-3 minutes.
  4. Deglaze pan with the stock, scraping up any browned bits in the pan.
  5. Add chard leaves and cover pan with a lid, turn heat down to low, letting chard wilt.
  6. Cook 6-8 minutes, stirring occasionally, until chard is tender; during this time, start to cook your eggs–I did mine basted, but you go on and cook your eggs however you like them.
  7. Season the chard sauté with salt and pepper to taste.
  8. Serve with the sauté topped with eggs.

I hear it every year:

“How do you keep your turkey so juicy?”

For a long time I used to explain my cooking process until eyes glazed over and the smile-and-nod reflexes would kick in.  So, now my response is, “I don’t cook the **** out of it.”

An overcooked turkey is a dry turkey–if you put it in a bag, or roast it upside down, or dance voodoo chants while it’s in the oven–it won’t matter if that turkey is in the oven for hours upon hours.  One of the best ways to guarantee a moister turkey is roasting with a high heat method and keeping that bird in the oven just long enough to get the thigh temperature to 161 °.  Sure, there’s always brining, and I have no beef with that process; in fact, I will brine turkeys when I’m smoking one.  However, I think there’s a few drawbacks to brining turkey, and I prefer doing a more traditional roast.  So, these are my tips on doing a traditionally roasted turkey that doesn’t turn to sawdust:

  • Buy a digital meat thermometer, preferably one that has a long ovenproof probe that you can keep in the bird while it’s in the oven.  Stick that probe deep in the thigh, as that’s where you’re going to test for readiness.
  • High Heat Roasting:  heat that oven at 500° (yes, really) and once you put your bird in the oven, close the door and set the timer for 30 minutes.  At 30 minutes, turn the heat down to 400, and don’t be tempted to open the oven door.  Keep it closed unless you’re seeing the breast getting too dark–go ahead and cover the breast with foil if that’s happening.
  • Pull the bird from the oven when the thigh reaches 161°.  Poultry is cooked at 165°; when you pull the bird out a few degrees early, the carryover cooking that happens while the turkey rests will bring it up to temperature.
  • Let it rest!  Loosely cover the bird with foil so it has a chance to finish cooking.  Give at least 20 minutes to smaller birds (under 13 pounds), 30 minutes to the bigger ones.  This gives the turkey a chance to finish cooking and for the juices in the meat to redistribute.  Cutting it straight out of the oven releases too many juices and will dry out the meat.
  • Don’t stuff it!  Put a few things in it for seasoning such as half an onion, a few sprigs of herbs, a quarter of a lemon.  But, a stuffed turkey means you have to make sure that stuffing also reaches 165°, and that can add more cooking time (which is exactly what we’re trying to avoid).
  • I put butter under the skin of the breast; it’s a great way to add a little extra fat and flavor to the breast.  Using a compound butter–butter blended with seasonings and herbs–is easy and can be done well ahead of time.

Compound butter is one of those nifty little condiments you can make and use to add tons of flavor with little effort.  The big granddaddy of compound butters is Maître d’Hôtel butter; a little fresh herbs, some lemon, and a bit of salt and pepper make a butter worth serving on hot steaks in fancy joints.  I’ve seen all kinds of compound butters popping up all over the place–from the basic lemon-herb to port-dried-cherry-bacon to chipotle-garlic.  Let me show you how easy it is to make, and I’ll let you and your imagination go from there.  Ready?

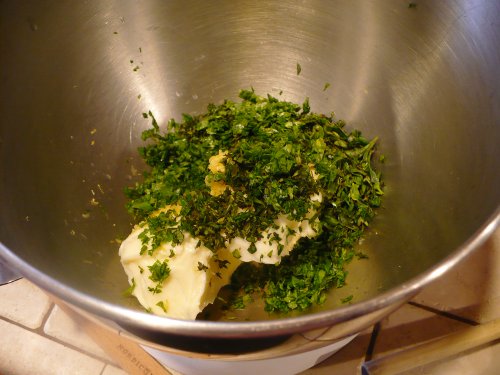
To start, have two sticks (1/2 cup) of butter, softened.  Add your ingredients into a bowl:

With this batch, I’ve focused on the flavors I prefer with turkey–parsley, sage, thyme, marjoram, and savory.  As a general ratio, expect to put about 1/4 cup of herbs to 1 stick of butter.  Also in the bowl is the zest and juice of one lemon.  I gave all of this a good beating using the paddle attachment in the KitchenAid mixer.

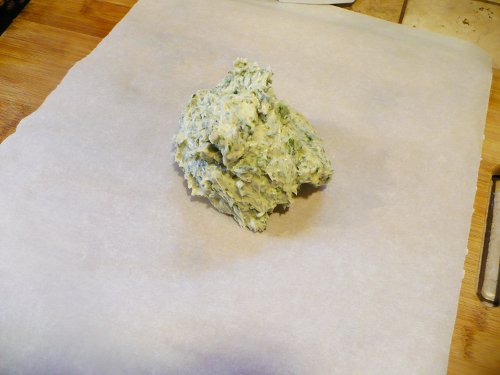
Plop all of that right in the middle of some parchment or waxed paper:

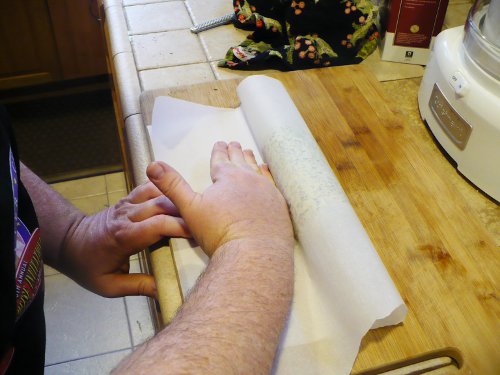
Fold the paper over and using your hands, push the butter into a log shape:

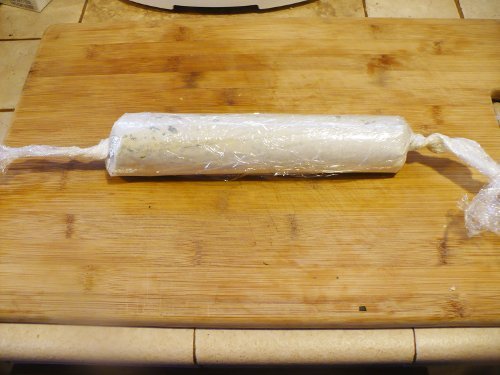
Roll the log in some plastic wrap and twist the ends to shape and press the butter into a firm cylinder:

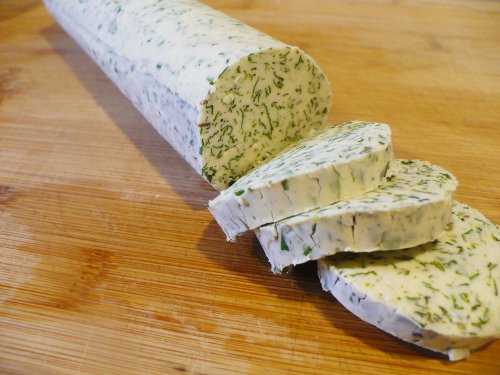
Refrigerate or freeze butter (this can be frozen for up to several months, so make extra and save for another dish in the future) and slice as needed:

See those little slices?  They’re perfect for sliding right under the skin of the breast, where they’ll melt and season the meat as it roasts.   Wasn’t that easy?

Are you ready for Thanksgiving?  How do you like to cook your turkey?

You know how it is:  you move to a new way of eating and you do your best to get the rest of your family on board.  Now, once Choo started to see the changes in my health and figure, he quickly followed suit.  Kiddo, on the other hand, has been a tough sell.  I’m starting out slowly… changing peanut butter for almond butter; having him eat eggs for breakfast instead of cereal a few times a week; making his lunchbox treats with less flour and more nut and seed meals.  One thing that’s been a challenge is replacing store-bought condiments with homemade; Kiddo isn’t fooled–he knows that’s not REAL ketchup.  I feel like I’ve been lucky to have a kid that actually does like some vegetables, but he’s been asking for “sauce” (Ranch Dressing).  Now, have you ever seen the label on a bottle of Ranch?  Yeah.  I’m not going there ever again.

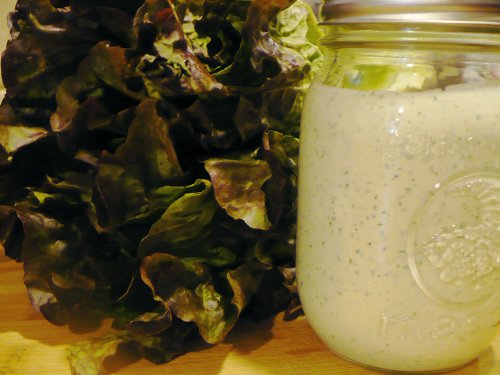
I had some lebni leftover from a trip to my local Persian market, along with some fresh herbs and buttermilk, a whirl through the food processor, and I had a dressing worth putting on salads and dipping our carrots.   This was quick to put together, and once put in a clean jar, will hold for about two weeks.


Creamy Herb Dressing

  • 1/2 cup mayonnaise
  • 1/2 cup Lebni,  full-fat Greek yogurt, or sour cream
  • 1 tablespoon lemon juice
  • 1 clove garlic, roughly chopped
  • 1/4 cup loosely packed fresh parsley leaves
  • 2 tablespoons fresh dill
  • 1/2 teaspoon salt
  • 1/4 teaspoon black pepper
  • 1/4 cup buttermilk (less if wanting a thicker dressing/dip)
  1. In a food processor, add mayo, Lebni/yogurt/sour cream, lemon juice and garlic clove and pulse about 3 times to mix.
  2. Add fresh herbs, salt, and pepper and pulse until herbs are chopped.
  3. Pour in buttermilk and pulse again until combined.
  4. Store in glass jar or container.

This past week, even though it’s still rather warm here in Southern California, I’ve definitely noticed the changes that mark the movement of Summer into Autumn.  They’re very subtle, and someone who hasn’t lived here for most of their lives wouldn’t necessarily notice–how the morning air is just a few degrees cooler, the afternoon light tilts just slightly casting a warm glow across the skies, even though it’s still 85 degrees outside.  With the seasonal nestiness kicking in, my thoughts have been moving to some of my favorite things to make–roasts, braises, and the like.  Tonight, I made some last minute plans to have friends over for dinner, so I wanted some uncomplicated dishes that I knew I could put together easily–a Roast Chicken with root vegetables cooked in the pan; a salad… but what about dessert?

Yes, even with living a primal lifestyle, dessert can and does come into the equation.  The occasional sweet thing is not verboten, and with a little tweak here and there, you can make something spectacular.  Here at El Rancho, I had a bag of pears sitting on my counter that needed some attention, and I KNEW what I had to make.

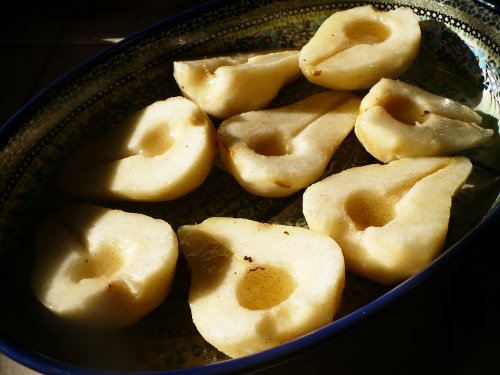
Taking the firmest of the pears, they got the peeling and coring of their lives.

A vanilla bean was split down the middle and scraped of its insides (wow, that sounds awfully violent, doesn’t it?) and blended with some melted butter and local Orange Blossom Honey.  After the pears took a little bath in this magical syrup, they were nestled in one of my favorite roasting dishes and put in the oven for an hour.

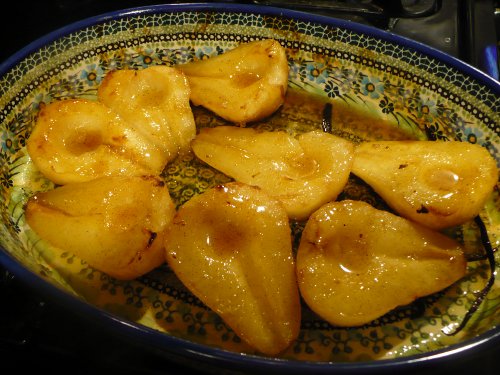
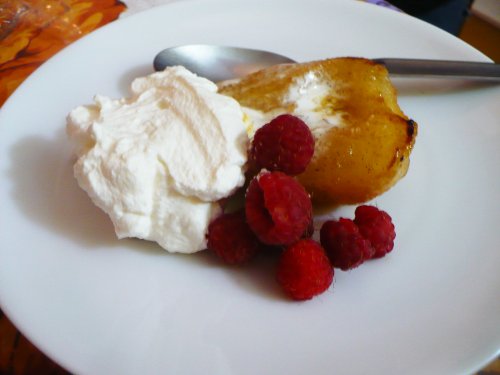
What came out:

And I’m not joking when I tell you these smelled amazing when they came out of the oven.  The pears with the honey, vanilla and a splash of lemon just works.   What’s fantastic is that the juices mix with the syrup and caramelize into this sauce you could pretty much wear as a perfume.  It’s so simple, but one of these guys with a spoonful of whipped crème fraiche and a handful of fresh raspberries… okay, words don’t do it justice.

I admit:  not the greatest picture.  Not gonna apologize for it, either–that pear was warm, the crème fraiche was melting, and I needed to PUT IT IN MY MOUTH.

Honey-Vanilla Roasted Pears

  • 4 firm pears, peeled, cut in half and cored
  • 1/4 cup honey
  • 1/4 cup butter, plus extra for pan
  • 1 vanilla bean
  • 2 Tablespoons lemon juice
  1. Preheat oven to 375°.
  2. Butter roasting dish and arrange pears cut side up
  3. Split vanilla bean and scrape seeds.
  4. Add seeds to a small saucepan with the honey, butter, lemon juice and melt on low heat until butter has melted and created a syrup.
  5. Tuck the remaining vanilla bean with the pears, pour syrup over the pears, making sure some of the syrup is in the core of each pear.
  6. Roast for about 30 minutes, then turn over and roast another 20-30 minutes until the pears are fork-tender.
  7. Turn the pears cut side up again, and brush juices over the tops.
  8. If you’d like a little extra browning like I did, turn broiler on low and broil the tops for 3-5 minutes.
  9. Serve warm with whipped crème fraiche or if you’re feeling decadent, some great vanilla ice cream.

I know I’ve been rather quiet here on BBB this year, for a multitude of reasons which I won’t bore you with all the details except for the major one:  the complete change of how my family eats, especially since the beginning of this year.   We’ve moved to eating in a primal/paleo fashion.  You may have heard of it–it’s gaining followers, and for good reason, I believe.  I’m not going to preach about it, but if you’re curious, you can learn more about it at the Whole9 Blog and Mark’s Daily Apple to just start out.  Essentially, we’ve cut things out of our diets such as grains, legumes and heavily processed foods; and began focusing our diets on meat, poultry, fish, eggs, vegetables, healthy fats such as coconut oil and things like fruit, full-fat dairy and nuts in moderation.   Sure, we’re not perfect–we do go off the rails sometimes for holidays or when we’re traveling–but we figure we always do the best we can, and our bodies do like to remind us when we’ve cheated enough.

It’s really been an incredible change for us.  I’ve lost 80 pounds and have seen many of my health markers change for the better:  my A1C, cholesterol and liver function numbers went to normal within 6 months of starting the diet–I sleep better and I have the energy to get through my day (with exercise, even!).  Choo has been on this also, and he’s lost somewhere to the tune of 50 pounds.

Anyway, I just wanted to let you know about this change, because it will change the tone of BBB in the future.  I may experiment with the occasional baked good that’s been tweaked to fit our lifestyle (because sometimes CAKE is the only thing that matters), but from now on, I’ll be focusing on dishes that will fit into a primal/paleo lifestyle.  Like this one:


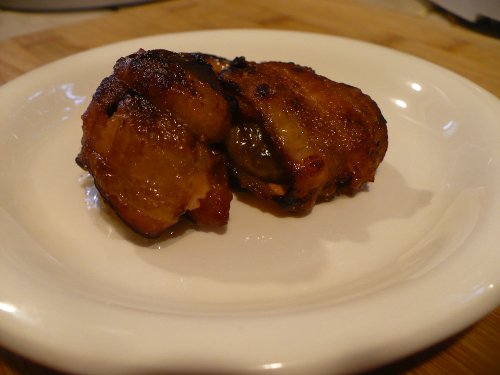
Oh sure, it’s BACON.  But, even with fat not being the enemy in a paleo diet, if you’re using cured bacon, it still needs to be treated like it’s candy:  sweet, delicious meat candy.  Still, these make a fantastic appetizer, especially right now while figs are at the height of their season.  These are super-easy but still impressive (don’t you love it when that happens?).

Bacon-Wrapped Figs 

Serves 6

  • 1 pound sliced bacon (about 12 slices)
  • 12 figs
  1. Heat your broiler on low and cover a sheet pan with foil.
  2. Slice figs in half lengthwise and cut bacon slices in half.
  3. Wrap bacon around figs, secure with toothpicks if needed (I didn’t need to, the bacon held in place)
  4. Place sheet pan in oven on the top rack setting, broiling figs about 7-9 minutes on each side, depending on how crisp you like your bacon.
  5. Fight the urge to immediately pop one in your mouth the minute they come out of the oven.


It’s been a busy few months (May is always one of my craziest months), but now that Kiddo is out of school, I can finally take a deep breath and… get back into the kitchen.  What better to do than jump in and do several days of baking?  Trust me, it’s for a good cause:  charity!  The adorable ladies of Run Around Betties are hosting a bake sale on Sunday, June 26th with all the proceeds going Share Our Strength which goes to ending childhood hunger in America.

And if you’ve been around for a while, you know I love a good excuse to get my sugar on.

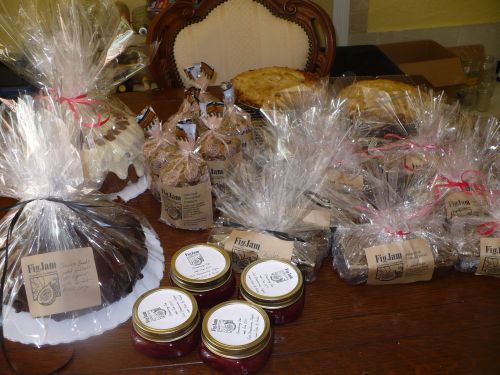
I bet you want to know what put together for the sale, don’t you?

Starting from the left, going clockwise:

  • Chocolate Bundt Cake, soaked in Firelit Coffee Liqueur, with Firelit Chocolate Glaze
  • Carrot-Pecan Bundt Cake, with Raisins & Dates, with Cream Cheese Glaze
  • Oatmeal “Breakfast” Cookies (packed with lots of dried fruit, nuts and seeds)
  • Maker’s Mark Caramel Apple Pies
  • Banana Nut Omega-3 Bread (with walnuts, flax seed meal and spiced with cardamom)
  • Chocolate Zucchini Bread
  • Homemade Strawberry Jam
Not pictured:  handmade waffle cones in Chocolate, Peanut Butter, Brown Sugar & Cinnamon and Caramel.
So if any of these tempt you and you’re in the area, look for the girls in polka dots at 4380 Ventura Canyon in Sherman Oaks from 10 AM to 2 PM and get some goodies for a good cause!

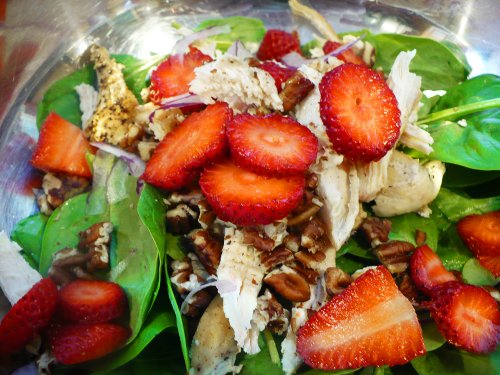
It’s about time I pop in and say hello!  I just had to share the salad I’ve been eating about every other day since strawberries have hit the farmer’s market in full force.  It’s really a combination of some of my favorite things in the world, all mixed together in one bowl.   There’s just such a melange of flavors and textures that it’s really satisfying–the leafy greens, the crunch from the pecans, the bite of red onion, the sweetness of the strawberries, and the acid from the balsamic vinaigrette just make this a delicious lunch.

Spring Spinach Salad with Strawberries and Grilled Chicken

Serves 2 as a small lunch dish

  • 4 cups baby spinach
  • 6-8 ounces grilled or broiled chicken breast, shredded
  • 1/4 of a small red onion, very thinly sliced
  • 8 large strawberries, sliced
  • 2 ounces broken pecan halves (about a large handful)
  • Balsamic Vinaigrette (or you can use your favorite) to taste

Just add all of those ingredients into a mixing bowl and toss until the vinaigrette is evenly distributed.

Happy Spring, everybody!

“You have made bacon.  You are like unto God,” said my friend, Chris.

“Oh my God, this bacon is obscene,” said another.

I even received the offer of being my cabana boy in exchange for a hookup of cured pork belly.

I think Kelis got it wrong:  it ain’t milkshakes that bring the boys to the yard.

There’s something so primal about seeing those thick ribbons of fat and the lip-smacking expectation of smoky, savory meat.  There’s nothing quite like the flavor profile that bacon adds to a recipe, turning greens into a sturdy side dish, intensifying sweets with its saltiness, and making a Sunday brunch dish memorable.

It is no secret that I love bacon, and learning how to make my own is one of the greatest pieces of knowledge I now have in my repertoire.   To be fair, this is not the first time I’ve made bacon–when Michael Ruhlman posted his instructions on how to home-cure bacon, I absolutely had to do it.  How could I not?  Still, even though I may have had a head start on some other Charcutepaloozers, I found myself making some rookie mistakes.  The first batch I made, I forgot to rinse off the cure before putting it in the smoker leaving the bacon overseasoned.  It was still good, but I was ready to try it again.  With the maple bacon I have pictured, my timing was all wrong.  The day I had planned on smoking my bacon it rained–and foolishly, I didn’t take it out of the cure, but left it in there for a few days longer, until I was ready to fire up the smoker.  Another rookie mistake:  not letting the bacon dry out and form a pellicle (a tacky ‘skin’ that forms on the meat which helps provide a surface that will hold on to the smoke flavor and also helps seal the meat to keep it from drying out) before smoking.  The bacon is fine enough, but I think the third time will be a charm:  no overcuring, rinsing off the cure, and giving the bacon a day to form a pellicle–got it.

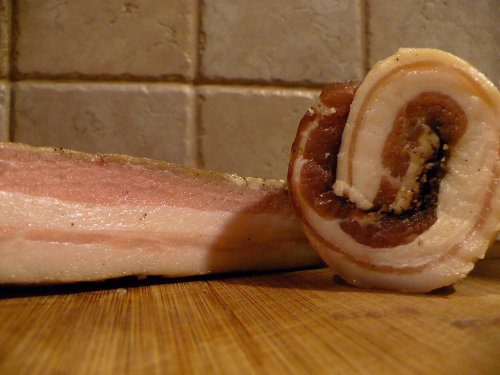
But, if we’re really going to talk about something awesome, let’s talk about the pancetta.  If I got anything right this time around, it was the pancetta.  I followed the instructions to the letter, poking the curing belly every other day, and laughing with Choo as we struggled to tie the roll properly.  I have been so thrilled with how it turned out that I’ve been sharing the goodness with everyone to the point where I now only have a few ounces left.  This past Saturday, I found myself cutting pieces out to all my dinner guests to take home–because cured pork belly is pretty darn close to love under this roof.   I have been using it in bits and pieces with my CSA greens–chard, collards and kale have all got the pancetta treatment, and Kiddo approves heartily.

I didn’t come up with a special recipe this time around, as I wanted to pull up some of my favorite bacon recipes I’ve posted before:

Chard Gratin with Bacon & Chevre

Brussels Sprouts with Bacon

The Bacon, Cheddar & Cornmeal Waffle

Bacon Maple Shortbread


I’m pretty sure I’m never going to buy bacon again.


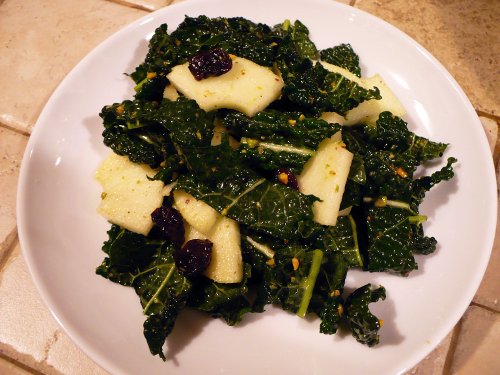
We’re back on the CSA Bandwagon after a break from the holidays.  Just before getting our box, my weekly newsletter from Food52 showed up advertising a Kale Salad with Apples and Hazelnuts which just sounded delightful.  I’m always looking for something new and interesting to do with kale–I usually throw it into a soup, but having it in a salad sounded really interesting.  Of course, when today rolled around and it was time to make dinner, I didn’t necessarily have everything that the original recipe called for, so I… improvised. And it was good.  So, I thank the fine people at Food52 for the excellent inspiration!  This salad worked very nicely with the broiled salmon and parmesan broccoli that were on the menu, and we knew we had something because Kiddo ate it (always a sign of success).

Kale Salad with Apples, Pistachios & Dried Cherries

  • 1 tablespoon Apple Cider Vinegar
  • 1 teaspoon Honey
  • 2 tablespoons Olive Oil
  • Salt & Pepper to taste
  • 1 bunch Lacinato Kale, washed and cut into 1″ ribbons
  • 1 large Granny Smith Apple
  • 1/4 cup finely chopped Pistachios
  • 1/4 cup Dried Cherries
  1. In a large bowl, pour in vinegar and honey and whisk until incorporated; add in olive oil in a slow stream while whisking constantly until smooth.  Season with salt and pepper to taste.
  2. Add kale and toss until leaves are completely coated with vinaigrette.  Set aside for about 1 hour to let leaves break down slightly.
  3. Peel, core, and slice apple;  toss into greens, adding nuts and cherries.  Serve immediately.